Makeup Makeover: Mom Edition
One special thing about this particular post is that my mom already looks great, partly because she is already in the right colors. My mom—though much tanner than I—is an Autumn palette just like me. Being in the business, I have done my best to ensure she always chooses the right colors for herself and then the rest is in the details.
The few things I am going to point out in this post are more about application than they are about color changes. When you have the right cosmetics, you’re halfway there; so, let’s dive in and perfect her look.

The Season: Autumn.
My mom has a very warm, healthy golden undertone. This makes these coppery, warm colors ideal to enhance her natural beauty.
Let’s begin with the complexion; the most critical part of the face, especially for Moms.
During the wintertime, she will use Tender Beige Luminous Foundation with Hydrating Foundation Primer underneath for a smooth finish, diffusing light to deflect from unwanted texture or lines. Tender Mineral Pressed Powder is then used to set the makeup, with a touch of bronzer added in a “3” motion to hit the forehead, cheekbone, and jawline for some healthy coloring and subtle contour.
In both images is the same foundation, powder, concealer, and blush. Only difference? Application technique and added bronzer to finish. Her lack of bronzer usage in the winter leaves her complexion a bit flat. For those of you with a more pronounced forehead, such as she, a little shading can help diminish its size and the touch of bronzer added to the jawline leaves her more chiseled. This drop of the right colored bronzer goes a long way to bring her face back to life again.
Under eyes are the next thing that get many Mom’s into trouble.
Their over-worked and sleep deprived complexions show all the damage in this tiny area. The best way to apply your concealer is to keep it restricted to the inner half of the under eye, making sure the shade isn’t too light, which can backfire increasing appearance of puffiness and causing a greyed finish; perhaps 16 years-old’s can get away with that approach with minimal repercussions, but for the rest of us, that’s a no. When you go to blend, use your ring finger to press it into place.
When applying concealer,
DO. NOT. RUB. A little pat, pat is the way to go when blending concealer; rubbing it in is a hell no.
Rubbing irritates and pulls at the eye, over blends, and wipes away all your hard work. A gentle patting motion with your ring finger keeps you from using too much pressure and the heat of your finger tips blends it in just right.
If you are someone who particularly struggles with fullness in your undereye, you might require a two-step process, applying a darker concealer to the full part of the undereye, and something light, restricted to the dark crease that falls just under the fullness, before meeting the rest of the face.
Any face makeup the creeps too close to the outer edge of the under eye can sink into unwanted lines enhancing everything we don’t want: texture, freckling, and crow’s feet. Instead, keep your eye cream in this outer under eye spot to give a hydrated glow that deflects unwanted flaws from becoming visible to others.
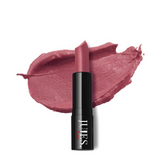
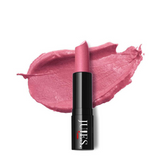
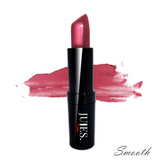
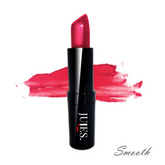
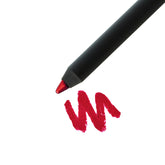
As a fairer Autumn, I will typically wear Apricot lipstick, but with the extra depth my mom has; she does much better with Copper Lipstick. Copper is a favorite frosted lip with the perfect warm tones to enhance her coloring, it is neither too muddy, nor too vivid. To keep her line crisp and clear, I used Cinnabar lip liner, and my all-time favorite gloss, Goldie Luxe, reserved to the center of her lips for a fuller pout.
When it comes to lipstick application, she does a fabulous job on herself; the problem here is that she was using the wrong lip liner. The liner she used was muted and mauvy-pink. This gave her a muddy edge that didn’t do much good for her. Using Cinnabar instead and applying it after lipstick, not before, helped to plump up her lips in an easy and natural way so they did not end up looking messy or pursed at the edges.
Her blush application is spot-on, no complaints here.
To keep the face lifted, you want to start your blush application in the upper half of the ear and aim for the nose, not the mouth. Dropping your blush too low is one of the worst mistakes you can make. As a rule of thumb for your stopping point, typically two fingertips from your nose is a good guideline. Visible blush at the front apple of the cheek helps keep a full and youthful glow, it’s a mommy must-have to brighten you back up. Teaberry Blush is her ideal color, with a delicate shimmer to give a healthy highlight to her cheekbone.

The Eyes:
Neglecting to pencil the base of her higher brow (left on image) and the top of her lower brow (right on image), leaves her asymmetrical.
*see first image to view both sides of her brow application.
A common mistake I find when using brow pencil is to apply it where you already have density in your hairs and to neglect where you need it most, in fear of overdoing it. All you end up doing is more harm than good this way because you end up enhancing the disproportions rather than correcting them. You want to put your pencil where you need it, not where you’re already full. Common places we are sparse is the base of the front quarter of the brow, the top latter half of the front section of the brow that leads into the arch, and then the tail as a whole usually gets butchered or forgotten. Once you reach your arch, start to angle down not out. If you pull the brow out too much, you are left looking like you just had a bad facelift. A little downward slope instead gives balance to your arch and the perfect lift for your lids.
To make your shadow last all day, you need to apply a good shadow base beneath it. My mom uses the medium shadow base on a regular basis.
A little goes a long way with shadow base; too much will make it impossible to set and will leave you with an oily creased lid. You just need a drop. To use it effectively, you need to apply the right amount of shadow on top.
When applying highlight and lid colors, you want to pat and press them into place. Knock it off with the sweeping motions, you only create dust that way. One change I decided to make in her shadows was to swap out her usual shimmery lid color, Glory, for Heiress, a smooth peach.

The smoothness of this helps to hide any lines in the lid area and add a pop to her eye. Many people think you need something super light and shimmery to give that pop, but typically, that is simply not the case.
Another mistake many people make is using colors that are too light all over the eye, hoping that will make it look bigger. This technique often only makes it look smaller, depending on your eye shape. For my mom’s deep-set eyes, having brightness on the lid is critical; but to neglect enough depth at the crease and corner, leaves her looking washed out.
Tierra Shadow was used on the bone (crease area) with a small brush for precise application. Start this darker color at the outer section of the crease and then blend over and up. If you struggle finding your crease, raising your eyebrows and adjusting your head position (keep eyes fixed looking directly in front while tilting your chin upward) is the best way to find exactly where your crease should be.
In the corner, we stuck with my favorite dark brown, Mink. Apply this at the back of the lid, below the crease and blend over.

Next Up: Let’s talk Eyeliner.

My mom is obsessed with her black liner, although rich brown is still more generous to her. She regularly lines top and bottom, inside and out with Black; I chose dark brown instead and restricted use of black for the inside line only.
Black is perfect for her lower waterline. Remember to avoid most browns, and all reds or purples in the waterline for they will make you look bloodshot as they wear off throughout the day. But for the upper line and the lower line, I switched out Matrix (Infinite Matte Black Liner), for Chocolate Mousse Gel Liner. It still gives her the striking finish she looks for in the black, without the liner overpowering the rest of her look.
And finally, Mascara.
My mom loves a full finish, so XLXL is the perfect touch. Remember to use your head movements turning your head slightly to the side opposing the eye you are on (turn right on left eye, turn left on right eye) to get easy access at the little lashes in the inner corners. These are critical for a full finish and they often are forgotten in the process.

If you love this Mommy Makeover look and want to find out more about how to apply this knowledge to yourself, you can message me here or DM on any other social media platform.
Prefer to call? The salon’s direct number is 856.751.2233, and remember to ask for JULES.
